Sound Machine Installation and UseSystem Requirements:
Windows 95 or above
Visual Basic 6.0 runtime files (you can get these from
here if required)
DirectX 8.0 or higher (only required for SoundMachineDX)
Instructions for use:There are two versions of the SoundMachine included in the distribution, you'll see them below:


The SoundMachineDX is a special version of the SoundMachine which adds the ability to play multiple sounds simultaneously. To use this version you need DirextX 8.0 or higher installed. Please see the special section below on using the SoundMachineDX.
The following instructions apply to both the SoundMachine and SoundMachineDX.
When you start the SoundMachine you will see the main window:

The four boxes will each display a list of the SoundPaks installed on your system. The current generation of Sound Machine supports up to 20 SoundPaks at any one time.
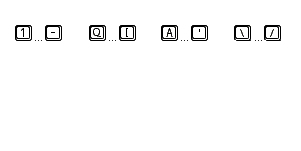
Using each pull-down box you can assign a group of keys to a SoundPak. The keys you should use are as follows:
1234567890- [Set 1]
qwertyuiop[ [Set 2]
asdfghjkl;' [Set 3]
\zxcvbnm,./ [Set 4]
To assign a SoundPak simply pull down the box - select your Pak and wait:

Depending on the size of the SoundPak and the speed of your system you may have to wait for up to a minute for the SoundPak to be unpacked.
Changing the skin:The 'skin' refers to the appearance of the SoundMachine. You are able to select from various pre-defined skins, as well as create your own.
Right-clicking the mouse in the main window will bring up a menu similar to the one shown below:

By moving your mouse to the 'Select Skin' option, you will find a list of installed skins appears in a sub-menu:

Simply select the new skin you want and it will be installed. Your skin preference is saved for next time you start the application.
Pak Info:Some SoundPaks ship with information regarding the sounds they contain. All existing SoundPaks now have this feature added - you will need to re-download the SoundPak to obtain the Pak Info data if you already have them on your system.
To view the Pak Info, again right-click on the main screen and select the 'Show Pak Info' option from the menu:

The Pak Info will appear in a separate window. You can move this to a convenient location on your screen - this will be saved when you next bring up the Pak Info window.
For each of the four live SoundPaks you will see a list of the sounds, and associated keys, on the Pak Info screen. Selecting the tabs at the top allows you to view the Pak Info for each active SoundPak.
When you change SoundPaks, the Pak Info window will automatically update.
 SoundMachineDX:
The SoundMachineDX can only be used if you have DirectX 8.0 or above installed on your system.
If you do not have DirectX then:
If you are running Windows 95, you should download the DirectX 8.0a runtime
http://www.microsoft.com/windows/direct ... drx80a.asp Otherwise go here
http://www.microsoft.com/windows/direct ... /drx81.aspThe SoundMachineDX adds a new menu option when you right-click the main window:

The channel selection allows you to assign a sound channel to each of the four active SoundPaks.
To understand what these channels mean, please consider the following set-up:
The first SoundPak is configured on Channel 1
The second SoundPak is also configured on Channel 1
The third SoundPak is configured on Channel 3
The fourth SoundPak is configured on Channel 4
This means that if you played a sound from the first SoundPak (for instance pressed '2'), and then immediately played a sound from the second SoundPak (by pressing 'W') - the first sound would be cut off and the second would begin to play.
If you played a sound on the first SoundPak (by pressing 1 for instance), you could simultaneously play a sound from the third (and if you wanted, fourth) SoundPak as they are assigned to different channels. Only SoundPaks on the same channel will cut each other off.
To silence all playing sounds, hit the '`' key (normally top left on the keyboard).
 Creating Your Own Skins:
Included in the skins/ folder of the SoundMachine distribution is a file called blank.jpg. This is a template which you can use to create your own SoundMachine skin:

Skins should be the same size as the blank provided (301 x 151), and must be saved as JPEG files and placed in the skins/ folder.
Thanks:The additional skins provided with the SoundMachine distribution were created by Tom Davey.
The Small Print:This program is free, but copyrighted by Chris Harris. This means you cannot redistribute it with your own skin as a different product and you cannot pass it off as your own work. You should not place this for download from your own site without the express written permission from chrismoyles.net.
It is your responsibility to check you have the rights to use any sounds contained within SoundPaks for whatever purpose you intend to use them.


